How to Repair a Damaged Roof Near a Chimney: A Complete Guide for Savannah Homeowners
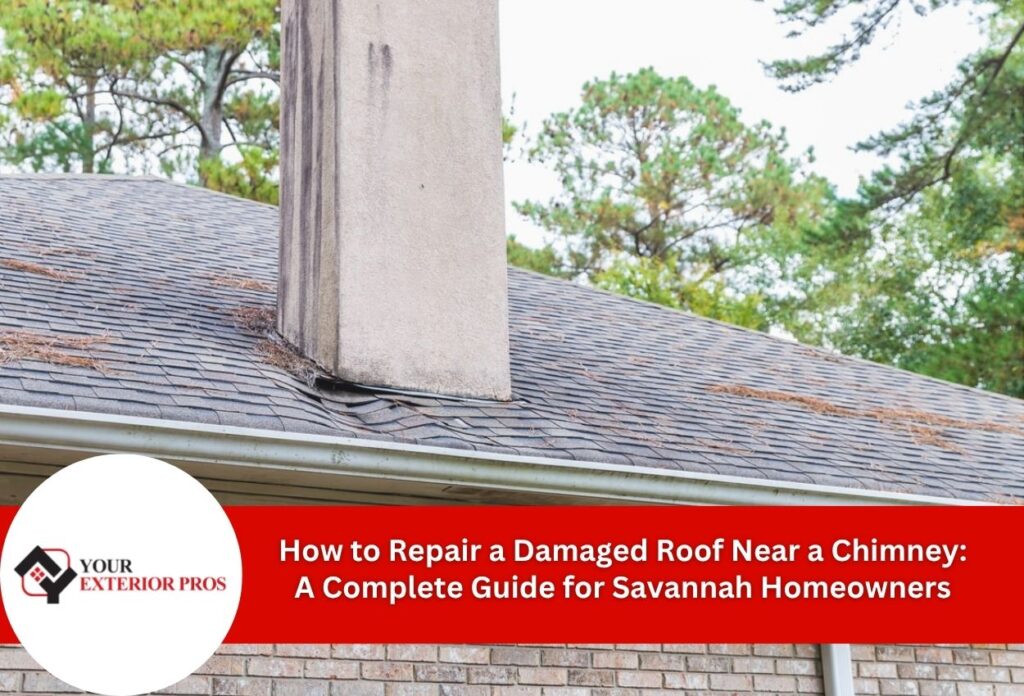
The area where your chimney meets the roof is one of the most vulnerable parts of your home’s exterior, especially in Savannah’s humid coastal climate. When damage occurs at this critical junction, water can quickly find its way into your home, causing extensive structural problems and interior repairs. From deteriorating flashing to cracked mortar and damaged shingles, roof issues near chimneys require prompt attention to prevent minor problems from becoming major headaches.
Savannah’s high humidity, salt air, and frequent storms create particularly challenging conditions for maintaining roof integrity around chimneys. These environmental factors accelerate wear on materials and can compromise even professionally installed systems over time. Seasonal tropical storms and occasional hurricanes further test the resilience of this crucial roof junction.
Understanding how to repair a damaged roof near a chimney is essential knowledge for local homeowners. Whether you’re dealing with water stains on your ceiling, visible exterior damage, or simply performing preventive maintenance, knowing the right techniques for chimney flashing repair and fixing damaged shingles in this area can save significant time and money. This knowledge helps you determine when a DIY approach is appropriate and when it’s time to call a professional roofing contractor.
How to Spot Signs of Chimney-Related Roof Damage
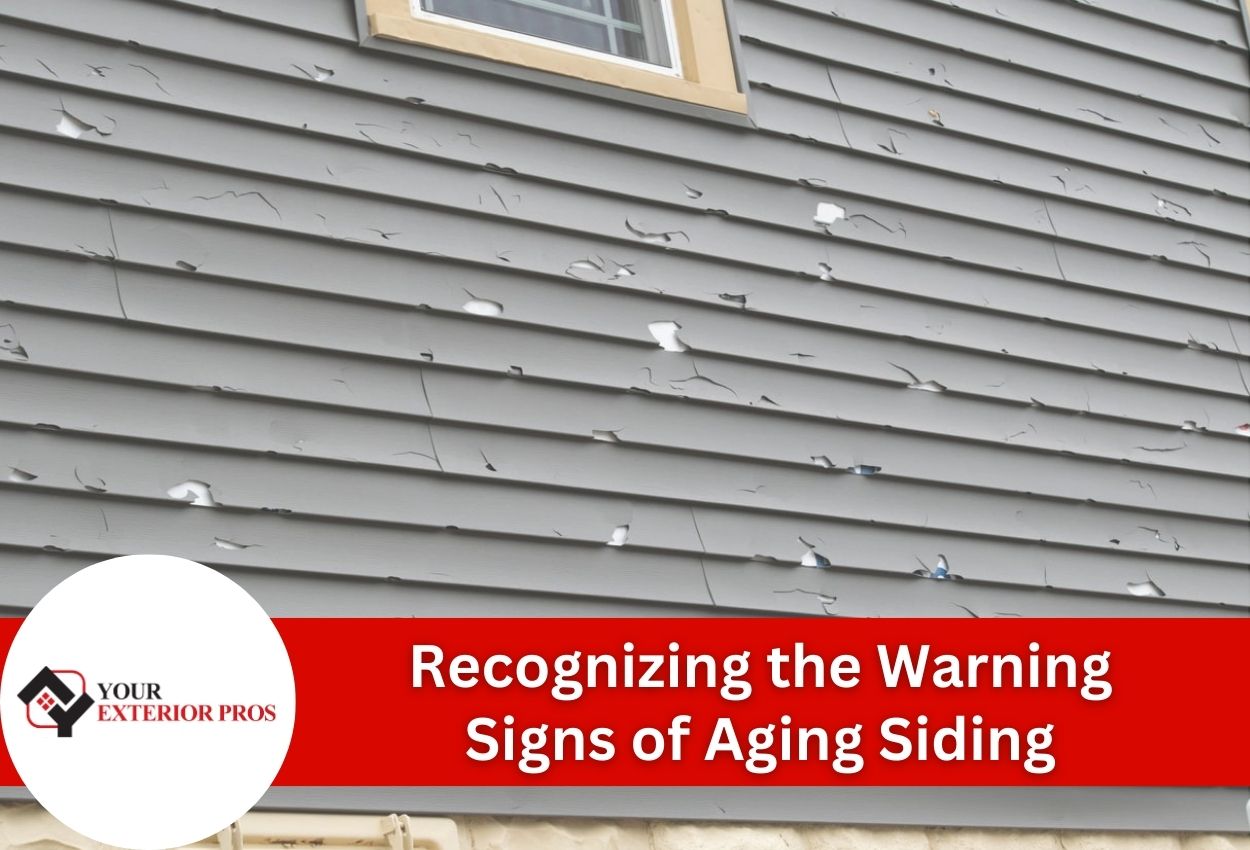
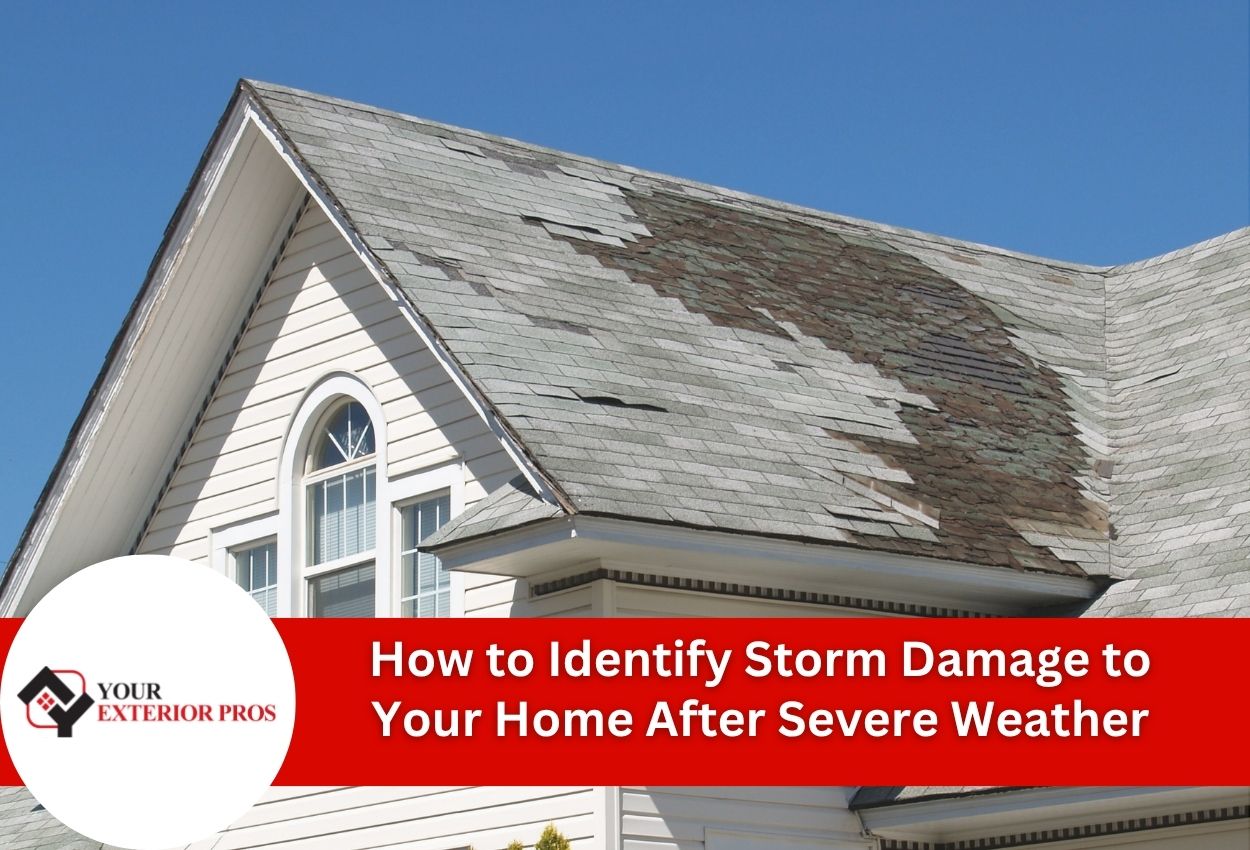
Detecting chimney roof damage early can save Savannah homeowners from extensive repairs later. The first signs often appear as water stains on ceilings or walls near the chimney. These brownish discolorations typically indicate water infiltration through compromised flashing or damaged shingles. From outside, look for missing, curled, or broken shingles surrounding the chimney base. The flashing, the metal strips that seal the roof-chimney junction, may show signs of rust, separation, or punctures that compromise its waterproofing ability.
Inside your attic, inspect for water trails along rafters that originate near the chimney area, damp insulation, or mold growth. These internal indicators often reveal problems before they become visible in living spaces. Also, check the chimney mortar for cracks or deterioration, as damaged mortar can channel water into your roof system.
For Savannah homeowners, timing inspections with local weather patterns is crucial. Schedule comprehensive checks after hurricane season, when high winds and driving rain may have compromised roof integrity. A second inspection in spring helps identify winter damage. When examining your roof, use binoculars from ground level whenever possible rather than walking on the roof, which can cause additional damage and pose safety risks. If access is necessary, choose dry, moderate-temperature days and wear rubber-soled shoes to minimize shingle damage while ensuring secure footing.
What Tools and Materials You Need for Chimney Area Roof Repairs
Tackling roof repairs around a chimney requires specialized tools and quality materials that can withstand Savannah’s challenging climate. For DIY enthusiasts, safety equipment is non-negotiable — always have a sturdy ladder, non-slip footwear, a safety harness, heavy-duty gloves, and protective eyewear. Essential tools include a roofing hammer, pry bar, utility knife, caulking gun, trowel for cement application, tin snips for cutting flashing, and a heat gun for working with existing materials.
When selecting materials for chimney roof repairs in Savannah’s humid environment, quality matters. Choose step flashing and counter flashing made from corrosion-resistant metals like copper or stainless steel that better withstand coastal salt air. For optimal waterproofing, invest in high-grade roofing cement specifically formulated for extreme weather conditions. Butyl rubber sealants provide superior flexibility and adhesion in our fluctuating temperatures and high humidity.
Replacement shingles should match your existing roof, not just in appearance but in quality and specifications. Water-resistant underlayment materials create an additional barrier against moisture infiltration during our heavy seasonal rains. Having the right tools and materials before beginning chimney roof repairs ensures a more effective, longer-lasting solution.
Step-by-Step Flashing Repair Techniques
Repairing damaged flashing around a chimney is a precise process that requires attention to detail, especially in Savannah, where water intrusion can quickly lead to extensive damage. The repair process begins with carefully removing the damaged flashing without disturbing the surrounding roofing materials. Using a flat pry bar, gently lift shingles and remove any nails securing the old flashing. Clean the chimney-roof junction thoroughly, removing old caulking, roofing cement, and debris to create a smooth surface for the new installation.
When installing new step flashing, each metal piece should overlap by around 2 inches so that moisture is directed down and away from the chimney. Cut L-shaped pieces from your flashing material, with each piece extending at least 4 inches up the chimney wall and 4 inches onto the roof deck. Secure step flashing with roofing nails placed high on the vertical leg to remain hidden by counter flashing. For the counter flashing, create a clean mortar joint in the chimney, then insert the bent edge of the counter flashing and secure with masonry screws.
Apply a high-quality urethane caulk at all metal joints and where the counter flashing meets the chimney. For extra protection in our humid coastal environment, consider applying a waterproof membrane around the chimney base before installing new flashing. This additional barrier provides crucial protection during Savannah’s intense summer thunderstorms and occasional tropical systems.
Addressing Damaged Shingles Near Your Chimney
When shingles near your chimney become damaged, immediate replacement is crucial to prevent water infiltration into your Savannah home. Addressing this issue requires careful work to maintain the integrity of both your roofing system and chimney structure. The main challenge is navigating the awkward angles where roof planes meet the chimney while ensuring watertight seals that can withstand our coastal climate conditions.
To safely remove damaged shingles around a chimney, start by gently lifting the row above the damaged area using a flat pry bar. Remove any nails or fasteners holding the compromised shingles in place, working carefully to avoid damaging the surrounding healthy materials. Use a utility knife to cut away any sealant bonds between shingles. When working near flashing, take extra precautions not to bend or damage these critical waterproofing components.
For installation of replacement shingles, precise cutting is essential to fit the irregular spaces around your chimney. Measure and mark each replacement shingle individually rather than using a template, as chimney corners often have subtle variations. For the best weather resistance, apply a small amount of roofing cement under each replacement shingle near the chimney edge. This provides additional water protection at this vulnerable junction. When installing replacement shingles in Savannah’s humid environment, avoid working during the hottest part of the day when asphalt shingles become more pliable and susceptible to damage during handling.
Waterproofing and Sealing the Chimney-Roof Junction
Proper waterproofing at the chimney-roof junction is critical for Savannah homes, where high humidity and frequent rainfall can quickly exploit any weakness in your roof system. When applying specialized sealants, start with a completely dry surface, ideally after 48 hours without rain. First, apply a polymer-modified roof cement around the base of the chimney using a trowel, creating a layer that extends 4 inches up the chimney and 6 inches onto the surrounding roof surface. For enhanced protection, embed polyester reinforcement fabric into this first layer while still wet, then apply a second coat of cement.
Elastomeric roof coatings work exceptionally well in our coastal climate, as they expand and contract with temperature fluctuations while maintaining their waterproof integrity. Apply these coatings in thin layers rather than one thick application, allowing proper curing between coats. For chimney crowns, apply a silicone-based water repellent that penetrates the concrete to prevent moisture absorption.
Maintaining these waterproofing systems is essential in Savannah’s climate. Schedule biannual inspections to check for cracked sealants or separated flashing. After severe storms, perform additional checks for wind damage. Apply fresh water repellent to the chimney crown every two years, and refresh elastomeric coatings every five years before they deteriorate. This preventive approach extends the life of your repairs and provides superior protection against our unique coastal weather conditions.
When to Call a Roofing Contractor for Roof Repairs Near the Chimney
While minor chimney and roof repairs can be handled by capable homeowners, most situations need a professional eye. Structural issues present the most urgent reason to contact a Savannah roofing contractor. If you notice sagging or deformation in the roof around your chimney, this indicates potential damage to the underlying supports that requires immediate professional assessment. Similarly, if water stains extend across ceilings or walls well beyond the chimney area, you’re likely dealing with extensive water infiltration that has compromised multiple roof components.
Another clear indicator of professional intervention is the presence of mold or rot in your attic or ceiling. Savannah’s high humidity creates ideal conditions for rapid mold growth once moisture enters your home. Professional roofers have the equipment and expertise to address not just the roof damage, but also to properly remediate these secondary problems. Additionally, if your home is one of Savannah’s many historic properties, specialized knowledge of period-appropriate materials and techniques becomes essential to maintain both integrity and value.
When selecting a Savannah roofing professional, ask about their specific experience with chimney-roof interfaces. Inquire about their certifications, particularly those specific to flashing installation and chimney work. Request details about material warranties and workmanship guarantees, especially important given our coastal climate challenges. For historic house owners, verify the contractor’s experience with traditional roofing materials and their understanding of preservation requirements for designated historic properties.
Expert Roof Repair Services for Chimney Damage in Savannah
If you’re facing the challenge of repairing your roof near the chimney, it’s important to fix the damage promptly to prevent further complications. Your Exterior Pros offers specialized services tailored for Savannah homes, ensuring your roof withstands humidity and storm conditions effectively. Whether it’s fixing damaged shingles, resolving leaks around the chimney, or complete chimney flashing repair techniques, our team is equipped to handle it all.
Call us today at (912) 250-4730 to schedule a consultation and ensure your home stays protected with top-tier roofing solutions. Trust Your Exterior Pros to restore the integrity of your roof with precision and professionalism.