


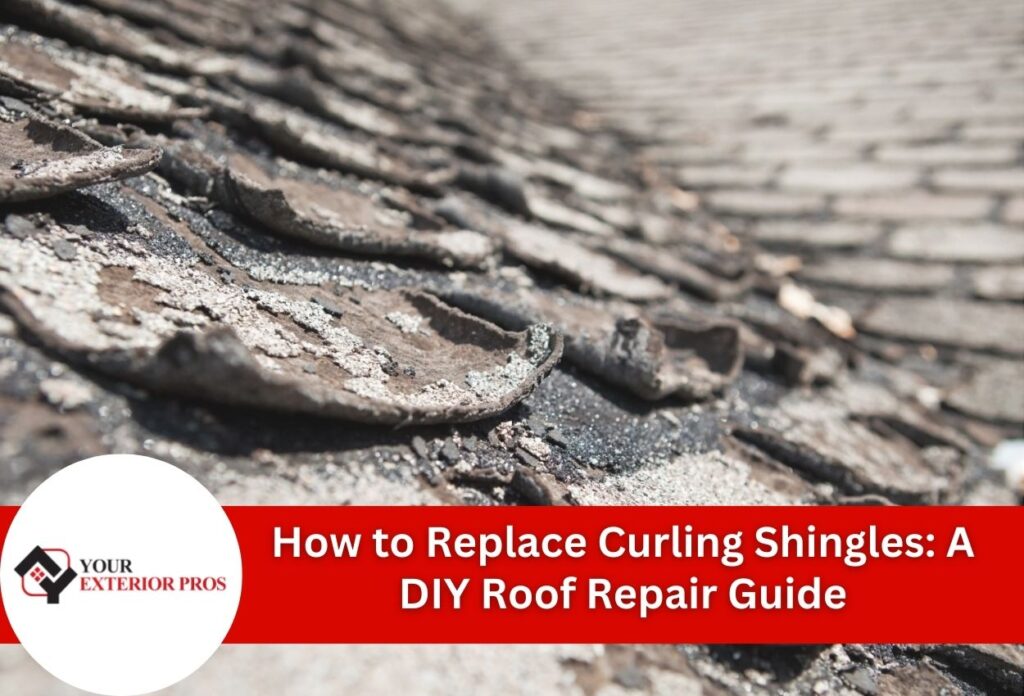
Curling shingles create serious problems for homeowners by allowing water to seep beneath the surface of the roof, potentially causing extensive damage to the interior structure of a home. When asphalt shingles begin to curl at the edges or corners, they lose their ability to shed water effectively, making immediate shingle repairs essential to prevent expensive issues down the road.
Several factors cause shingles to curl, including age, poor ventilation, manufacturing defects, and extreme weather conditions. Heat buildup in the attic often accelerates this process, while UV exposure gradually breaks down the shingle material over time. Understanding these root causes helps homeowners identify when damaged shingle removal becomes necessary.
Asphalt shingle replacement can be handled as a DIY roof repair project in many cases, particularly when dealing with isolated damaged sections. However, extensive curling across large areas of the roof typically requires professional intervention to ensure proper installation and long-term protection. The replacement process involves carefully removing compromised shingles, inspecting the underlying roof deck, and installing new materials that match the existing roofing system.
Proper roof shingle maintenance and quickly replacing curling shingles prevent minor issues from becoming major structural problems, protecting both the roof’s structural integrity and the home’s interior from water damage.
Identifying Problem Areas and Assessing Damage
Recognizing the visual signs of shingle deterioration helps homeowners determine when curling shingle repair becomes necessary. The most obvious indicators include edges that lift away from the roof’s surface, creating gaps where water can get in. Cracked shingles often accompany curling, particularly along the edges, where flexibility decreases over time.
Missing granules represent another warning sign during roof shingle maintenance inspections. Bare spots on shingles appear darker than the surrounding areas and feel smooth to the touch compared to properly granulated sections.
Safety needs to take priority when inspecting roofing systems for damaged shingles. Essential tools include a sturdy ladder, non-slip footwear, gloves, safety goggles, and binoculars for initial ground-level assessments. Avoid roof inspections during wet conditions or high winds, as these circumstances significantly increase the risk of accidents.
Documenting problem areas with photographs helps track deterioration progress and supports decisions about whether DIY roof repair remains feasible or if asphalt shingle replacement requires professional expertise to ensure proper installation and long-term performance.
Gathering Materials and Preparing for the Job
Successful asphalt shingle replacement requires specific materials and tools to complete curling shingle repair effectively. Essential supplies include replacement shingles that match the existing roof color and style, galvanized roofing nails sized appropriately for the shingle thickness, and roofing cement or adhesive for securing loose edges. A flat pry bar helps with damaged shingle removal, while a hammer and utility knife complete the basic tool requirements.
Protective equipment ensures safety during DIY roof repair projects. Non-slip shoes with good tread provide essential traction on sloped surfaces, while work gloves protect hands from sharp edges and rough materials. Safety glasses prevent debris from entering the eyes during removal and installation processes. A sturdy extension ladder supports safe access to work areas.
Weather conditions significantly impact roof shingle maintenance success rates. Ideal temperatures range between 45 and 85 degrees Fahrenheit, as extreme heat makes shingles too pliable while cold temperatures cause brittleness that leads to cracking during installation. Savannah’s humid subtropical climate offers the best working conditions during spring and fall when temperatures remain moderate, and rainfall occurs less frequently.
Wind speed should remain below 15 mph for safe rooftop work. Clear skies with no precipitation forecast for at least 24 hours after completion are perfect conditions that allow proper curing of the material to happen, preventing leaks during the repair process.
The Process of Removing Damaged Shingles
Removing damaged shingles begins with loosening the adhesive strips that secure curled sections to the roof deck. Start by gently lifting the damaged shingle’s edges using a flat pry bar, working slowly to avoid tearing the material or damaging adjacent shingles. Heat from direct sunlight makes this process easier, as warm asphalt becomes more pliable and releases its grip on underlying surfaces.
Remove the roofing nails holding the damaged shingle in place by sliding the pry bar beneath the nail heads and applying steady upward pressure. Be sure to fully extract the nail from the roof, as additional sharp metal could potentially damage new materials or the underlying materials. When performing repairs on multiple sections, work from the top row downward to maintain proper overlap patterns.
Clean the exposed roof deck thoroughly after damaged shingle removal, brushing away loose granules, old adhesive residue, and debris that could prevent proper adhesion of replacement materials. Inspect the underlying area for signs of moisture damage, soft spots, or nail holes that require patching before proceeding with asphalt shingle replacement.
Check surrounding shingles for loose nails or lifting edges that might indicate broader roof shingle maintenance needs. Address these issues during the current repair to prevent future problems. This systematic approach to DIY roof repair ensures that the replacement shingles will lie flat and create an effective water barrier.
Installing New Shingles Correctly
Proper positioning of replacement shingles ensures seamless integration with existing roof patterns and maintains the water-shedding capabilities essential for effective curling shingle repair. Begin by aligning the new shingle with the established course line, matching the exposure pattern of surrounding materials. The bottom edge should align perfectly with adjacent shingles to create a uniform appearance and prevent water from finding entry points between misaligned sections.
Overlap requirements play a critical role in successful asphalt shingle replacement projects. Each shingle must extend at least 6 inches beyond the cutout or joint of the shingle below it, creating multiple layers of protection against leaks. Side edges should overlap neighboring shingles by approximately 1 inch, ensuring complete coverage of the roof deck beneath.
Nailing techniques directly impact the longevity of DIY roof repair efforts. Drive galvanized roofing nails straight through the shingle and into the roof deck, positioning them just below the adhesive strip but above the cutout area. Use 4 nails per shingle on slopes up to 45 degrees, spacing them evenly across the width. Nail heads should sit flush with the shingle surface without overdriving, which can create punctures that allow water infiltration.
Apply roofing cement sparingly along the edges of replacement shingles to create additional adhesion and prevent future lifting. This supplemental bonding is especially valuable during the maintenance of roof shingles in areas experiencing high winds or temperature fluctuations that contribute to damaged shingles and removal needs over time.
Finishing Touches and Quality Control
Ensuring new shingles lie completely flat against the roof surface requires careful attention to detail during the final stages of asphalt shingle replacement. Walk around the repaired area to identify any lifted corners or edges that might indicate insufficient adhesion or improper nail placement. Press down firmly on any raised sections while the roofing cement remains workable, creating uniform contact with the roof deck.
A comprehensive final inspection validates the quality of DIY roof repair work and identifies potential issues before they become problems. Verify that all nail heads sit flush with shingle surfaces and that no fasteners remain exposed to weather elements. Check alignment with existing courses to ensure consistent water flow patterns across the entire roof section.
Examine the perimeter of the repair area for loose granules or debris that could clog gutters or indicate installation problems. Test the flexibility of new shingles by gently pressing on corners to confirm proper adhesion without forcing movement. Document the completed damaged shingle removal and replacement with photographs for future roof shingle maintenance reference, noting the date and materials used for warranty tracking purposes.
Preventive Maintenance to Avoid Future Problems
Establishing a regular inspection schedule prevents minor shingle issues from developing into major curling problems that require extensive asphalt shingle replacement. These inspections help identify early warning signs such as slight edge lifting, granule loss, or small cracks that indicate the beginning stages of shingle deterioration.
Early detection of curling begins with recognizing subtle changes in shingle appearance and performance. Look for areas where edges appear slightly raised or where granules collect in gutters after rainstorms. Dark streaks on roof surfaces often signal moisture retention that accelerates the curling process.
Simple maintenance tasks can significantly extend the lifespan of shingles and reduce the frequency of DIY roof repair projects. Keeping gutters clean to prevent water backup that can seep under shingle edges and trimming overhanging tree branches that scrape against the roof surface during windy conditions. Removing debris such as leaves and twigs that trap moisture against shingle surfaces and create conditions favorable to premature aging.
Professional roof shingle maintenance services become valuable when homeowners lack the time, tools, or expertise to perform thorough inspections safely. Consider a professional evaluation if multiple areas show signs of curling, if the roof approaches 15 to 20 years of age, or after severe weather that may have caused damage not visible from ground level.
Ensure Your Roof’s Longevity with Professional Shingle Replacement
If you’ve noticed curling shingles on your roof, it’s crucial to address this issue promptly to prevent further damage to your home. While DIY methods are available, the complexity of roof repairs often needs professional expertise, especially in cases of extensive damage. At Your Exterior Pros, we specialize in identifying problem areas, safely removing damaged shingles, and installing new ones to restore your roof’s protection effectively.
Don’t let curling shingles compromise your home’s safety and curb appeal. Contact us today at (912) 250-4730 to schedule a consultation and ensure your roof is in top condition. Trust Your Exterior Pros to provide a thorough, durable solution tailored to Savannah’s climate and your specific needs.
Frequently Asked Questions
Got questions about your roof? We’ve got answers. From maintenance tips to insurance claims and repair timelines, our FAQ section covers the most common concerns homeowners have. Get informed and make confident decisions about protecting your home.
People Also Ask:
Can I replace curling shingles during winter in Savannah?
Winter replacement is possible but challenging due to cold temperatures, making shingles brittle and prone to cracking. Adhesive strips also don’t bond properly below 45 degrees. If emergency repairs are needed, use extra roofing cement and handle materials gently to prevent damage during installation.
What happens if I ignore curling shingles for several months?
Ignoring curling shingles allows water to get to the deck of the roof, potentially causing wood rot, mold growth, and interior ceiling damage. The problem spreads to adjacent shingles as water infiltration weakens the underlying structure. Early intervention prevents these cascading issues from requiring extensive structural repairs.
How do I match replacement shingles to my existing roof color?
Bring a sample of your current shingle to the supplier, or take a high-resolution photo in natural daylight. Shingle colors can fade over time, so new ones may appear slightly different initially. Consider replacing an entire section rather than individual shingles for better color consistency.
Are architectural shingles better than regular asphalt shingles for preventing curling?
Architectural shingles typically resist curling better due to their thicker construction and improved manufacturing quality. They have multiple layers that provide better dimensional stability and enhanced wind resistance. However, proper installation and adequate ventilation remain crucial factors regardless of the shingle type chosen.
What should I do if the roof deck underneath shows water damage?
Damaged roof decks require immediate professional assessment and possible replacement before installing new shingles. Soft spots, dark staining, or sagging areas indicate structural compromise that DIY repairs cannot adequately address. Installing new shingles over damaged decking leads to failure and safety hazards.
Related Articles
-
 July 19, 2025How to Seal Asphalt Shingles and Protect Your Savannah HomeProtect your Savannah home from leaks—follow our step-by-step guide to sealing asphalt shingles.
 -
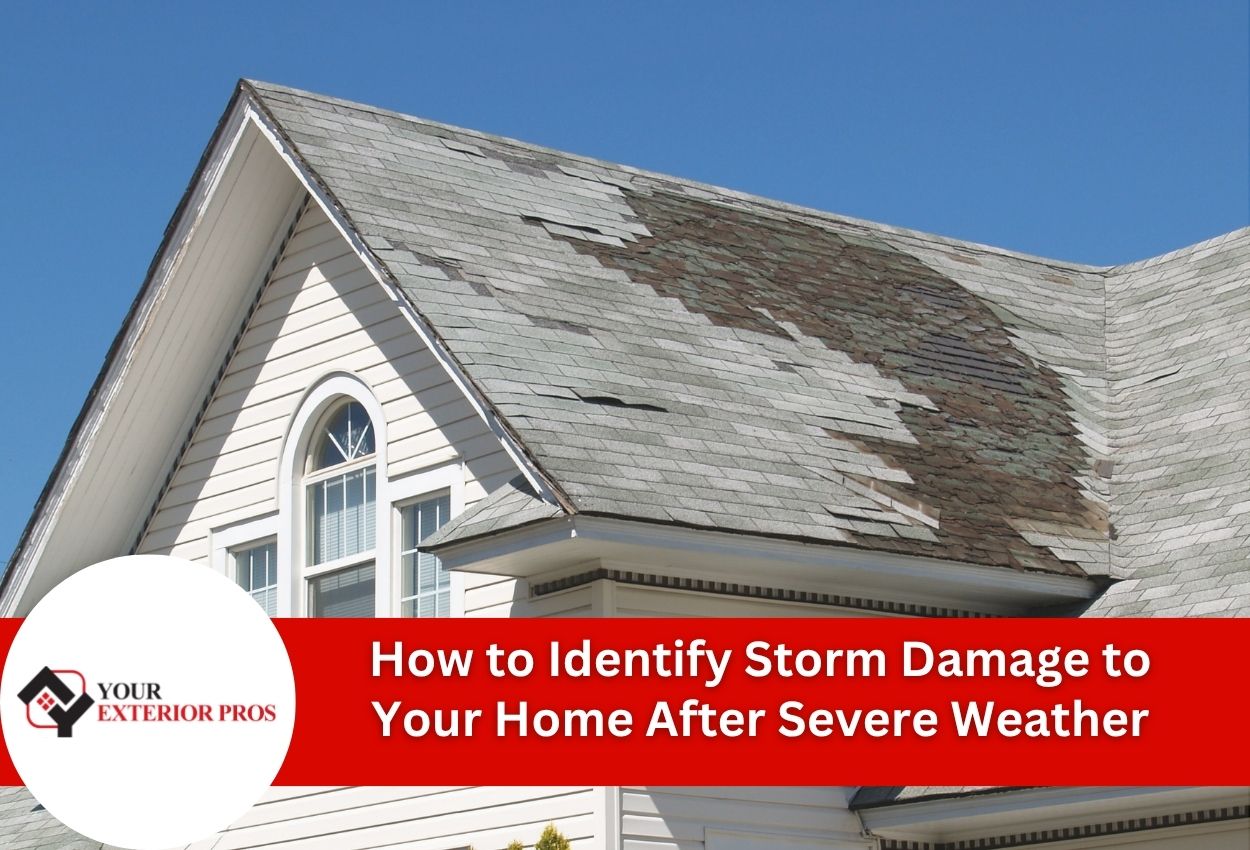 October 18, 2025How to Identify Storm Damage to Your Home After Severe WeatherConcerned about storm damage after bad weather? Use our inspection guide to spot signs of damage to your home.
 -
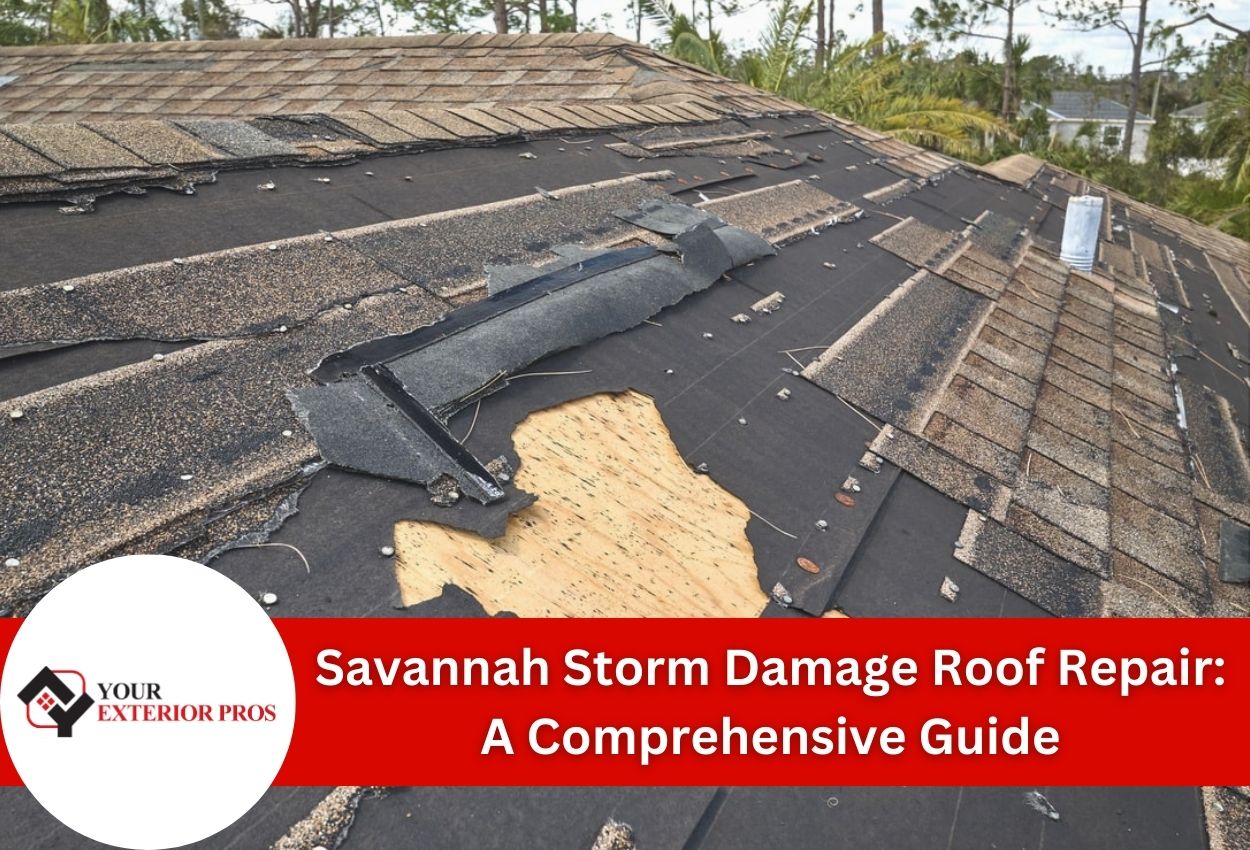 October 16, 2024Savannah Storm Damage Roof Repair: A Comprehensive GuideIs your roof storm-damaged in Savannah? Discover the signs, potential issues, and expert repair options.
Protect Your Home with Expert Roofing
Don’t wait for leaks or storm damage to cause costly repairs. Our experienced roofing team provides fast, reliable service, high-quality materials, and lasting results. Ensure your home stays safe, secure, and looking great—contact us today for a free estimate.

